Elementor makes it simple and quick to create a new page. In contrast to creating a landing page, creating a new page in the page builder provides you with an empty canvas to work with. Create your own page right now by following these easy steps.
What is Elementor?
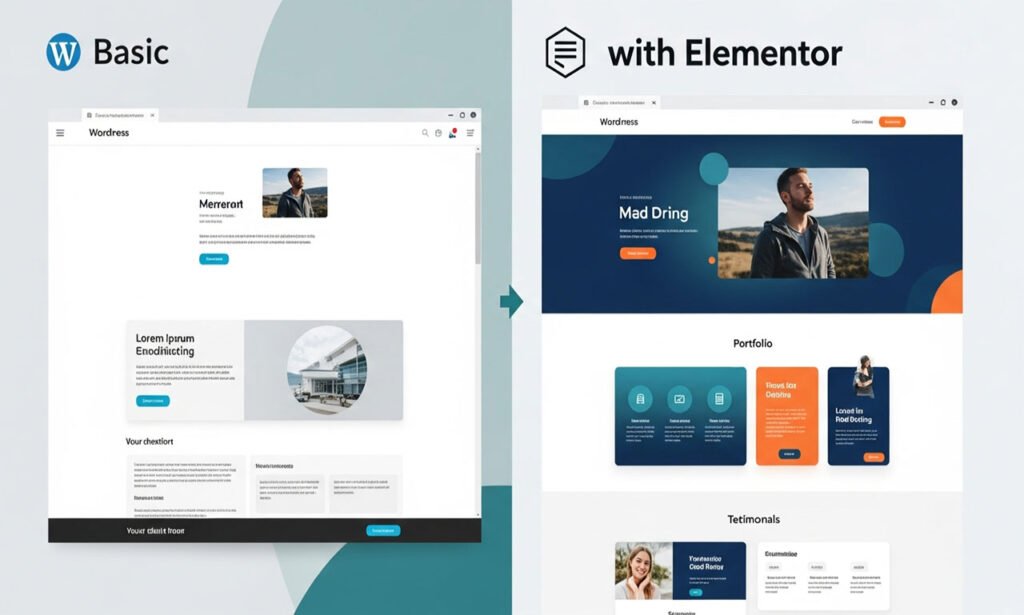
- With its user-friendly drag and drop interface, Elementor is a WordPress page builder that enables you to build and modify dynamic, mobile-friendly websites. Right now, it’s the most widely used page builder.
- You shouldn’t have any problems with it because it works with almost every WordPress theme and plugin. Elementor comes in two versions: a free version and a Pro (paid) version. While the Pro version offers even more features and flexibility, making it perfect for regularly creating custom websites, the free version offers a variety of tools and options.
- You can design directly on the front end of your website using the drag-and-drop builder, allowing you to see your changes right away. This removes the need for Elementor to switch between design and preview modes, simplifying the process and removing any hassles in getting your website to look just right.
- It is easy to use and has everything you need to build a fantastic website.

The steps that should be followed to create a new page using Elementor are:
- Log in to Your WordPress Dashboard.
- Go to the Page section, and click on Add New.
- Enter a title for your new page.
- Click on Edit with Elementor.
- Once you are well pleased with your design, click on Publish.
- Create a Stunning New Page Quickly with These Steps
- Open a new page using Elementor
Before you begin building your new page with Elementor, there are a few essential things that you need to have in place. First of all, you must have WordPress installed on your website. Besides that, it is important that you have installed and activated the plugin. You must have an idea of what you intend to achieve with your page and what content you intend to add. Finally, it is important that you have a WordPress theme that is compatible with Elementor, or else you may have problems with its design.
Installing an Active WordPress
To create a new page, you first need an active WordPress installation.
This implies that WordPress must be installed and functioning on your hosting server. First, you must ensure that your domain is registered and connected to your hosting company. After installing WordPress using your hosting control panel or using the one-click installer offered by many hosting companies, you must set up some basic settings. This includes setting up your site title, admin username, and password during the installation process. After installing WordPress, you will be able to access your WordPress dashboard. Using this dashboard, you will be able to install and activate the basic plugins to create your new page using Elementor.
Installing the free plugin “Elementor”
In order to get the best out of it, first of all, it is necessary to install this free plugin. For this purpose, it is necessary to go to the direction of your WordPress dashboard. Then, it is necessary to go to the “Plugins” section. After this, it is necessary to click on “Add New,” and then it is necessary to write “Elementor” in the search bar. If you see the logo
Page Designer plugin, click “Install Now.” After this, it is necessary to click on “Activate” to activate this plugin. Using this free plugin of Elementor, which has been installed and activated, it is possible to create web pages with ease.
To install Elementor Pro, follow these steps to unlock the full potential of your website design capabilities:
Purchase Elementor Pro
To visit the official site of Elementor and purchase the Elementor Pro plan, which best fits your requirements, you can get a download link for the Pro plugin along with the license key after purchasing.
Download Elementor Pro
You can download the Pro plugin by clicking on the download link, which will send you an email confirming your purchase.
Installation of Elementor Free Plugin
First, ensure that the Pro version is already installed and activated on your NB WordPress site. To install the free plugin, you will need to navigate through the dashboard of your WordPress site, then select “Plugins,” and then proceed to the “Add New” section. After that, you will need to search for “Elementor,” then click on “Install Now” and “Activate.”
Installation of Elementor Pro
First, you will need to navigate through the dashboard of your WordPress site, then select “Plugins,” and then proceed to the “Add New” section. After that, you will need to click on the “Upload Plugin” button located at the top of the page. You will then need to select the Elementor Pro .zip file you downloaded earlier and click on “Install Now.” After installation, you will then need to click on “Activate.”
Activate Your License
You will be required to activate your license to enjoy all the Pro options after activating the Elementor Pro plugin. You will navigate to “Elementor” in your WordPress admin panel, type “License “, and activate your license using your license key. You will then type “Activate,” which will activate your license.
Start Designing
With Elementor Pro enabled, you can now access all the fresh features and templates. You’ll be assigned a runner or post, and you can just click” Edit with Elementor” and begin designing and customizing your website with the fresh tools and functionalities provided by Elementor Pro.
By following these ways, you’ll be suitable to successfully install Elementor Pro and help you in designing a professional and dynamic website.
Now that our setup is ready, we can do with our way
Step 1: Enter the runners Section of the Dashboard
Navigate to the top left corner of your WordPress dashboard. There, you’ll find a main navigation menu. Inside this menu, you need to click on the ‘ runners’ button to expand it. After clicking, you’ll be presented with a list ofsub-options. From this list, you need to click on ‘ Add New’ to start erecting a brand new runner.
Step 2: Click on the Edit with Elementor Button
After that, you are required to click on the ‘Edit with Elementor’ button to access the Page Builder interface. If the installation and activation of the Elementor plugin have been successful on your WordPress website, you will be able to view and select this option. By clicking on the ‘Edit with Elementor’ button, you will be able to access the editor and utilize the drag and drop functionality and various widgets available in the Elementor plugin to customize your newly created page easily.
- Take note of: For users of WordPress 5.0 and later, who utilize the Elementor plugin proficiency from the Gutenberg editor, the proficiency is maintained. To be the editor of your page with Elementor from within the Gutenberg editor, you will use the “Edit with Elementor” switch.
- Provided that, if you encounter any issue with the matter in question or discover that you are not effective with editing using Elementor, there are various readjustment heads you can attempt.
- Ensure the plugin is installed and activated: You can attempt double-checking whether the Elementor plugin is installed or activated on your WordPress dashboard.
- Bring to a standstill for Plugin Conflicts- You can attempt to deactivate all other plugins except the one and see whether the problem is solved. If the problem is solved, you can attempt reactivating all the plugins individually to identify the conflicting plugins.
- Update Plugins and Topic: You can attempt to ensure that all the plugins, including the WordPress topic, are updated to the latest version.
- Clear Cache: Your browser cache as well as any caching plugins installed on your WordPress site could be the reason for the problem. Try clearing the browser cache as well as the site cache.
- PHP (Powers of Observation): First, check if your server supports the required version of PHP. requires a minimum of PHP 7.0.
- Check Memory Limit: requires a minimum WordPress Memory Limit of 128 MB. You can try increasing the WordPress Memory Limit by adding the following line of code to the WordPress-config.php file: define(‘WordPress_MEMORY_LIMIT’, ‘256M’);
By following these steps, you can avoid the most common problems faced while editing using the Elementor plugin.
Step 3: Attach a New wing
Upon entering the “Edit with Elementor” switch, the Elementor Page Builder will immediately transport you to a rich and user-friendly interface. This rich interface has many essential sections to ensure that the entire process of designing and customizing your web pages is perfect and intuitive.
The Editing Environment
i. Widget Panel
On the left side of your screen, you will notice the widget panel. This is your primary toolset. It is packed with an array of widgets that you can use to add to your page. The widgets vary from simple ones that are equivalent to text boxes, images, and buttons to sophisticated ones that include sliders, testimonials, and social icons. All these widgets are easily drag-and-dropable. After adding the widgets to your layout, you are free to customize them and make them fit your design vision.
ii. Editing Area
The main part of the screen is the editing area. It is here where you will carry out the bulk of your pattern-related operations. The editing area is a WYSIWYG (What You See Is What You Get) editor. This means you will be able to see your substitutions in the text as you make them. By adding anything to the text in this part of the screen, you are able to access the settings of the element in the widget panel. This makes it easy to edit the text, look, and other advanced settings such as animations and responsiveness. This ensures your page is both visually appealing and functional.
iii. Add New Section
At the lowest level of the editing process, the “Add New Zone Push” option is found. Entering this will assist you in organizing your content in a structured and visually appealing way. When adding a new section, you can use various pre-designed layouts or a conventional layout by entering the number of columns and the width of each column. This will assist you in creating unique layouts based on your content structure and overall look and feel.
iv. Add New Template
Just next to the “Add New zone” push button is the “Add up to date Framework area. Elementor has a treasure trove of pre-designed frameworks that you can instantly add to your page. These frameworks are professionally made and have a variety of uses, including landing pages, homepages, contact forms, and portfolios. Templates are a huge time-saver, as they allow you to create a beautiful starting point for your project that you can then customize to meet your needs.
Building Your Page
Now that you have the Elementor Page Builder interface at your fingertips, you are ready to build your page. Let your juices of productivity flow and take full advantage of the powerful features. You can create as many new boxes, columns, and widgets as you want to design your page. Design each one to fit your needs, and your page will be both aesthetically pleasing and highly justified. The drag-and-drop functionality makes it simple to try out different designs and layouts, and you can open a professional-grade page even if you have no experience with layout design.
Repeating the Process
The goddess of the Page Builder is its flexibility and scalability. You can repeat the process described above as many times as you want to create several pages for your website. Every time you click on the “Edit with Elementor” toggle, you will be able to use all the tools and features provided, which will enable you to open as many unique and customized pages as you need for your website. Whether you are creating a simple landing page or a complex multi-page website, you will be provided with the tools you need to make your vision come true.
In conclusion, the Elementor Page Builder is a powerful and flexible tool. With its rich editing options, including the widget panel, editing area, and new section and new template options, you will be provided with everything you need to create professional and visually appealing web pages. Whether you are a beginner or an experienced web design professional, you will be able to easily create and expand your website with Elementor, ensuring that your content is always fresh, appealing, and perfectly tailored to your audience’s needs.
It is a WordPress page builder that comes with all the tools that one needs for creating and designing drag and drop type websites. It is one of the highest standard tools, especially for a beginner. It comes with a ton of functionality that allows one to view pages in real-time as they are created.
Thanks for reading our article.
Developer at WordPressCarePoint
Booking for 30 minute Free Consultation on Google Meet: Click here for an appointment today.
contact@WordPresscarepoint.co.uk
www.wpcarepoint.com